Thursday, October 25, 2007

Experiment 4 Bioprocess Tech

After smelling so much of E. coli culture (which pretty resembles our pee)...
We are at the final stage! Harvesting.
This stage involves the isolation and purification of product.

Isolation
Isolation
basically means setting our product apart from the rest of the culture broth. But before doing so, we need to first look at the nature of our product.

In this case, our product of interest is Green Fluorescent Protein (GFP) – an intracellular product (produced within the cell). Therefore, it is necessary to lyse the bacteria cells to release those proteins. Evil humans, aren’t we? We have to kill those E. coli for GFP after treating them so well.

Hence, we need to isolate the bacteria cells before we can lyse them to get our GFP. After collect 10 mL of culture broth in a tube, we obtained the cells by centrifugation at 10, 000 rpm for 5 minutes. This process allows the separation of cells from the liquid broth which now contain all the cell exhaust, cell debris and remaining nutrients. We certainly don’t want them, do we?

After centrifugation, the cells being denser, form a pellet at the bottom of the tube while the liquid broth being less dense, constitutes the supernatant. To confirm that the product is in the pellet, we simply pour the supernatant into another tube before viewing both tubes under UV light.
Well, well. Illustrations are indeed BO-RING. So here’s a picture we took:


*TADA* Have a look at our tubes under the UV light.

First tube from left contains the supernatant (liquid broth) separated from cell pellet in tube 2 after centrifugation.
Second tube contains only the bacteria cell pellet. Notice how the pellet fluoresces under the UV light.
Third tube is the tube containing both supernatant and pellet.

Without UV light, it looks like this:

And now, with our bacteria cells, it’s time to kill them! *Evil laughters*
I seriously think that we are some sort of mad scientists.

To do that, three methods of cell disruption (cell torturing?) are performed.

  1. Using enzymes (Chomping their membranes apart?)
  2. Freezing and Thawing (To induce Temperature shock)
  3. Sonication (Ultrasonic waves!)

Method 1: Using Enzymes
Firstly, we resuspend the pellet in 500µL of TE buffer of pH 7.5 using a micropipettor until there are no visible clumps. Then, we added two drops of lysozyme to the resuspended cell pellet – this initiates the enzymatic digestion of the E. coli cell wall.

This will initiate the enzymatic digestion of the bacteria cell wall. Allow the enzymes to act for 15 minutes. Such a poor thing that they have to die so slowly...

à Resuspended pellet in TAE buffer and lysozyme.

Method 2: Freezing and Thawing
I really love this part as it involves liquid nitrogen!

After enzymatic digestion, our next ‘torturing’ phrase involved this particular liquid that is of -196°C (Very very cold). Even though it looks pretty like dry ice (Cos they give off lovely vapours too), but they’re pretty dangerous. So never place your hand inside liquid nitrogen!

We first dip our falcon tubes into liquid nitrogen until the contents are frozen. Then, we thaw it in warm water before repeating the 2 cycles of freezing and thawing. This completes the process of rupturing the bacteria cell wall. Basically, freezing and thawing works because it adds mechanical stress to the cell wall as the cell water content expands (when frozen) and contracts (when thawed).


The diagram shows the process of freezing with liquid nitrogen. Yup it looks pretty much like water. I could still remember hearing those sizzling sounds and seeing those vapors as we dip our tubes inside it.

Method 3: Sonication
Our last torturing phase involves the use of ultrasonic waves which completes the cell disruption. During the process, ear muffs are required because those waves are of higher frequency than sound. Sonication causes bacteria cell wall to implode under the vibrational pressure. It is done on ice for 4 cycles of 25 seconds with 10 seconds rest in between Sonication cycles.

Sadly, due to limited ear muffs, only one of our group mates can conduct sonications. But anyway, there’s a picture of the sonicator:

And yup. It’s a really simply box indeed. Like a torture chamber.

And here’s Ah Guan and Hafiz who did the sonications. Don’t they look like DJs at work? Cool ear muffs - Kinda stylo, don’t you think?

After cell disruption, we spun the contents of the tube again in the centrifuge for 20 minutes at 10,000 rpm. Then, like what was done previously, the pellet and supernatant were visualized under the UV light again.

*Notice that the supernatant is fluorescing instead of the pellet now. With the cells being ruptured, green fluorescence proteins escaped the boundaries of the cell and form one of the supernatant’s constituent. The pellet constitutes the cell debris which does not glow due to the absence of GFP.

Purification
With the extract obtained from isolation earlier, it’s time to purify them!

Purification means the removal of impurities – cell debris especially after lysing of cells.

It is necessary to purify our extract so that the product can be used for other purposes. In this experiment, we used gel filtration or gel permeation chromatography to purify our GFP product. Such method of purification uses a column of a polymer gel resins (Sephadex G75). The resins contain very small pores in which molecules that are small enough can diffuse within. Hence, when the extract is poured into the column, the larger molecules will flow through the column faster where the smaller molecules will spend more time interacting and diffusing into the pores of gel resins. This achieves separation of different molecules by size.

Below shows an illustration of how the column looks like:

This looks pretty complex. But in actual fact, the column looks like that:

The resins are small and transparent.

Note the difference in buffer layer and the layer containing the gel matrix.

Procedure of purification of GFP:
We have labeled 9 tubes (“1 to 8” and “blank”) with a mark at 2ml level. The column was carefully drained into the waste breaker to adjust the buffer level such that it is just even with the top of the gel bed. Cell-free extract was then transferred to the top of the gel bed by gently stirring the pipet around the inside edge of the column, just above the top of the packed matrix. (Extra care is taken to not disturb the matrix)

We then start taking fractions by placing one labeled tube (tube 1) under the stopcock, and carefully releasing the stopcock to collect the eluant (buffer). The flow rate was adjusted to a 1drop/2 sec interval. Precautions are taken to not let the entire column run dry by continuously adding 50mM ammonium bicarbonate buffer to the top of the column when fractions are taken.

The same collecting procedures were done till the all 8 tubes were filled.

With all samples collected, we then transfered them to plastic cuvettes for measuring of absorbance. (This part done by our dear Miss 3!)

Before measuring of absorbance, we must always first have our blank to zero our readings. In this case, we used ammonium sulphate buffer (without any sample) as our blank.


More pics of purification and sonication. Credits to Miss LoanShark

Result for Isolation and Purification of GFP
(By Miss 3)


Answers to Questions:
1. Based on the graph, the peak occurred at fraction 2. In general, the higher the concentration of absorbing substance, which in this case, green fluorescent protein (GFP) in a sample, the greater the amount of light will be absorbed i.e. a high absorbance reading will be reflected. Since fraction 2 had the highest absorbance, this would mean that most of our GFP was collected in this tube.
The absorbance for the first fraction will usually be low due to the fact that when the sample was first added to the chromatography column, it takes some time for it to reach the other end of the column. Hence, what was collected in fraction 1 will be mostly the solution that was contained previously in the column i.e. ammonium bicarbonate. From fraction 2 onwards, the GFP will start to be eluted. Hence, the absorbance will be observed to increase till it reached a peak. Once it had reached a peak, it would mean that most of the GFP have been eluted. Therefore, the subsequent fraction will have lesser GFP contained in it, and the absorbance will be observed to decrease significantly.


2. For size exclusion chromatography, as the proteins travel down the column, the low molecular weight proteins will interact and diffuse into the pores of the gel resins, retarding their flow. On the other hand, the higher molecular weight proteins are less able to enter the pores of the gel resins, so they will be eluted first. Therefore in this case, a protein with a Mr of 50,000 kD will elute in a fraction before GFP, which has a Mr of 27,000 kD.

Guess that ends what I have to say for what we did during isolation and purification of our product.

Hope you had fun reading it!

MissET aka LaoDa ;)

Wednesday, October 24, 2007

Experiment 3 Bioprocess Tech

Hey hey!! Yo yo!! After preparing the pee looking LB broth the day before and having it autoclaved in an autoclave machine (something like a mini 121°C pressurized sauna) of course, we finally get to put the seed culture in.

Tadah!! The fermenter with fresh autoclaved media…

However, before putting in the seed culture, we added Ampicillin (an antibiotic) and Arabinose (an inducer) through the syringe. But why? Why do we need these 2 things?

Well... The E. coli that we used only became GFP E. coli after a plasmid vector was inserted. Basically, the vector that was used has Ampicillin (Amp) resistant gene and an Arabinose (Ara) inducer gene linked to the lux gene (GFP).
The Amp will prevent other bacteria from growing. The GFP E. coli can grow in the media as it has the Amp resistance gene. The Ara on the other hand will induce the formation of GFP in the E. coli (so that we can collect it for later!!).

After the addition of the Amp and Ara, we set up the control parameters of the fermenter as follows:

Temperature : 32°C (optimum for GFP folding and fluorescence)
pH : 7.5
Stirred speed : Min 10%, Max 90%. Control to AUTO
pO2 set point : Set point 20%. Control to AUTO
: Stir to CASC & Airflow to CASC
Airflow : Min 25%, Max 100%.

This is the control panel where we input the parameters.
Cheem looking machine right? Wires here and there.

Inoculation and Harvesting
After setting the parameters, 10ml of the media was taken out as a blank sample for the spectrophotometer reading later on.

The 100ml of seed culture was then inoculated to initiate the fermentation process.

The fermentation was continued for 24 hours before the harvesting step. For harvesting, 10ml of the fermentation broth was aliquoted out every hour into a sterile disposable test tube until we have 11 tubes of fermentation broth. The broth will be used to measure the absorbance at 600nm and from the graph obtained; we will be able to see the growth stage of the bacteria.

Anyways, this is the history chart of the fermenter.

This is the one of the most complicated graph I have seen in my life... For now at least :P

Spectrophotometer
After getting the 11 tubes of fermentation broth, approximately 2ml of broth from each tube was transferred to a cuvette to measure their absorbance. After transferring the broth into the cuvettes (zzz…boring work), we measured the absorbance at 600nm. Starting from tube 1 (the blank), we zeroed the spectrophotometer and proceeded to measure the absorbance of each tubes (another boring job…Really slow la… Can only measure one by one…).

Well after slowly taking the absorbance ONE BY ONE, the readings were compiled into this table below. (We took the liberty of logging the values so that the graph plotted will look all pretty. Haha!)

And this is how the graph looks like:
From here we can see that the growth phase is exiting from the exponential phase and entering the stationary phase. This is a good time to start harvesting the GFP as the bacteria will soon start entering the death phase (where all the cute little bacteria just die, die, die…Wah… evil sia…).

Well… That’s all I have to say for now!! See ya soon!!

~HaIKAN (You know.. This name really sux…)

Tuesday, October 23, 2007

Experiment 2 Bioprocess Tech ...damn boring... O.o wahaha

For this experiment…its just for all of us to learn how to prepare a bioreactor, make MEDIA(again..for hafiz and i) for both scale-up fermentation and seed culture.

To make 2Litres of media…we just added 50g of LB powder and topped it up to 2Litres…making sure no foams are form as we were told that the presence of foam would result in the loss of media and cells…


a top down view while we were trying desperately to mix the powder with distilled water?...doesn't it look like the opp of an egg?..(white yolk..yellow egg 'white') LOLS


Then, we separated 100ml into a flask to be inoculated with our bacteria which were on a LB-agar plate and incubated it overnight while the remaining 1900ml was poured into the fermenter and AUTOCLAVED TOGETHER.. ALL AT THE SAME TIME..
wow….its a wonder nothing blew up.. wahaha..

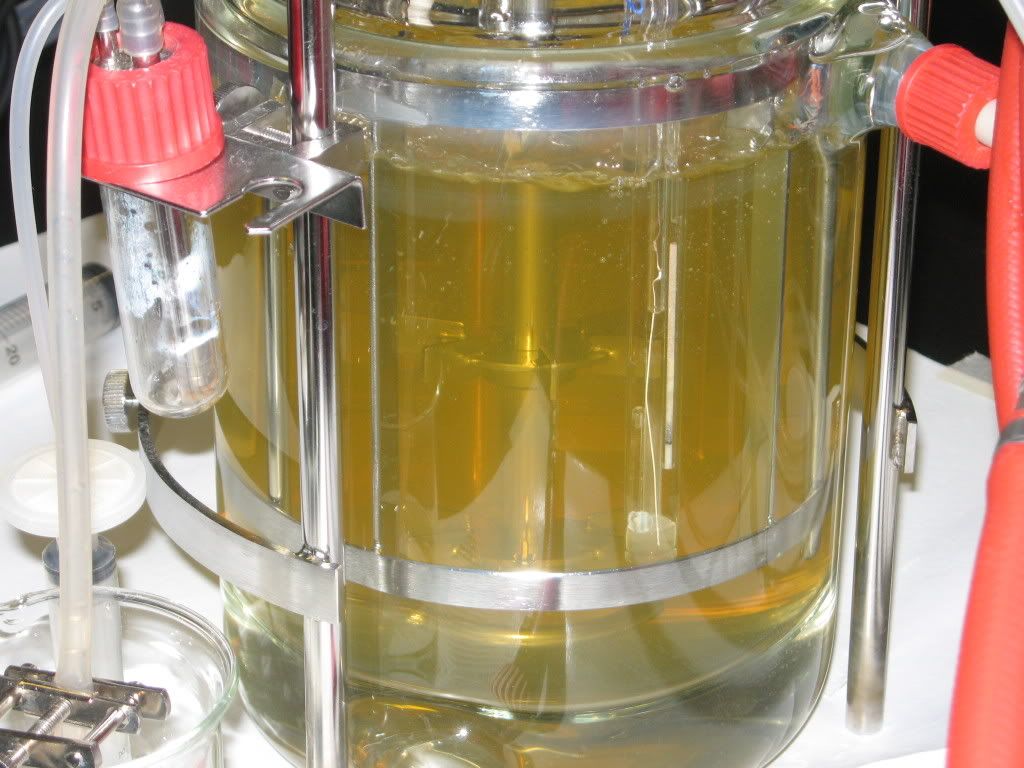
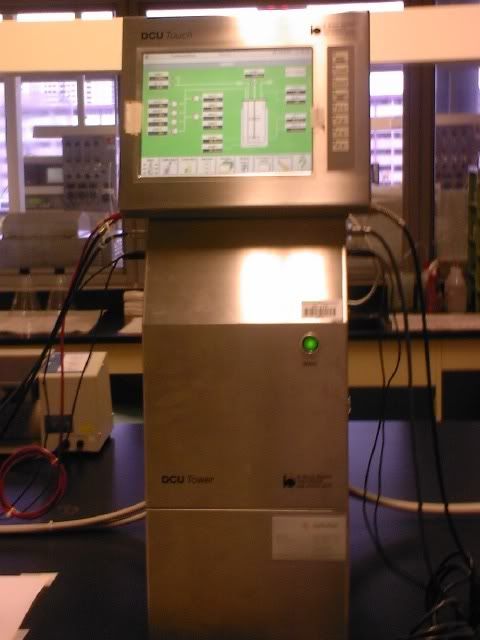
Ok… and as for preparing the fermenter itself…we didn’t really do much…it was more like..the teacher and the DT doing it..so I ain’t gonna copy and paste la hor.. XD


Done by Killa

Experiment 1 Bioprocess Tech
Answers to Questions:

Q1.
1. A mammalian cell bioreactor has four rotameters while a microbial bioreactor only has one.
2. A mammalian cell bioreactor does not have baffles, unlike the microbial bioreactor. This is to reduce the shear forces in the bioreactor as mammalian cells are very fragile.
3. A mammalian cell bioreactor uses marine impellers instead of the flat-blade impellers used by microbial bioreactors as it gives a more gentle agitation.

Q2.

1st stage:
- Get familiar with the different parts of the fermentor, their function and operation procedures. A brief idea about what is the fermentation process is given.
- E.g. motor is used to turn the impeller. If lots of foaming is formed during fermentation process, antifoam is added to reduce the foaming.

2nd stage:
- The media (Luria-Bertani Medium) for seed-culture was prepared. It contains Bacto-tryptone (10g), yeast extract (5g), NaCl (10g), d H2O (1000ml). The final pH of medium was adjusted to pH 7.5.
-Preparation of bioreactor was done by calibrate the pH electrode; install the pH probe, pO2 probe, foam and level probe, connect addition lines for acid, base and antifoam.
- Preparation of seed culture is done – streak plate of E.coli was performed on LB/Amp/Ara plate. The cells growth after incubation is used for scaling up fermentation.

3rd stage:
- One loop of colonies (E.coli cells) was transferred from the agar plate to the culture medium (ampicilin is added to the culture, final concentration is 0.2%)
- The control parameters of the fermentor are set.
E.g. pH= 7.5, stirred speed: min 10%, max 90% (about 500rpm), temperature=32°C or below, airflow: min 25%, max 100%.
- Culture (cells) is inoculated into the fermentor, and 10ml of sample is taken every hour after the culture is inoculated. 11 samples are taken (including the blank).
- 10ml of sample was taken from harvested culture.

4th stage:
- Isolation if green fluorescent protein (GFP) is done. Supernatant was taken out.
- Isoenzyme was used to resuspend the supernatant, in order to digest the bacteria cell wall.
- The tube (contains cells) was placed in liquid nitrogen and then warm time for 3 times to completely rupture the bacteria cell wall. Cell disruption is completed by sonication using ultrasonic waves.
- The protein mixture (contains product) is purified by gel filtration. This is done by separating mixture of molecules by size.


Done by Miss LoanShark ;)

Monday, October 22, 2007

Hello!
Konnichiwa!
Guten Tag!

Howdy!

Annyeonghaseyo!
Bonjour!
Ni Hao!
Apa Kabar!
Hola!
Sawatdi Ka!

Different greetings in different languages.

One from each of us! Oops, i forgot one more - dolphin's hello. :x
Anyway, a very very very big "HELLO!" to all of you visiting this blog. (:

To start off..
Let us introduce to you, who we are and what this blog is all about.

As seen from the top of the blog - MB0601A's BIOPROCESSTECHBLOG, we're from Nanyang Polytechnic School Of Chemical and Life Science
s Diploma in Molecular Biotechnology Year 2 Module Group 1a students.
Long isn't it? :D heh heh.
That's the main point! haha.
We want you to read through it and understand where we're from.
Repeat after me!
We're from.......
Nanyang Polytechnic School Of Chemical and Life Sciences Diploma in Molecular Biotechnology Year 2 Module Group 1a students! ((((:

Our group consists of 10 people and 1 dolphin. :x

Erm.. I mean 11 people from the module group 0601, thus forming group A while the remaining classmates are group B.
The 11 of us are...
YiTian - MissET aka. LaoDa
Nisa - Miss 3
ZhuangYan - Miss LoanShark
JunYi(AhJun) - Killa
Hafiz - HaIKAN
Audrey - MrsLeong

XiaoBin - missRANDOM
FuhYuan (AhGuan) - Rioter
Leon - MyFlag
Alvin - Bomber
Daniel - Dolphin
:D

SO!

This blog is actually for our bioprocess technology practical.
You'll get to know what we did during our practicals, and move along to what we're doing!
However, please do NOT try this at home.
Unless you want lots of cells growing everywhere in your house. =\

Nonetheless..
Let's start on it! (:

But first!

Let's take a look at the heart throb of MB year 2 students..
SEXY Mr. Ong CM in the zoo... :x

(apologies to the innocent people in the picture. )

Wanna know how we got it?
Don't tell you
! :D

missRANDOM. (: